So let's start... first you need strips. I used 2.5" strips, but you could use any size you want. Of course, the smaller they are, the more seams. You could even do various sizes - 2", 2.5", 3", 4" and so on. The amount of strips are going to depend on how scrappy you want the binding and how big your quilt is... so it's up to you to figure that out. You do need the strips to be the same length though. I used the width of the fabric.
You're going to need to cut off the corner at a 45 degree angle. In the picture below it shows the ruler in the 45 degree place. Only one side of the strip needs to be angle cut.
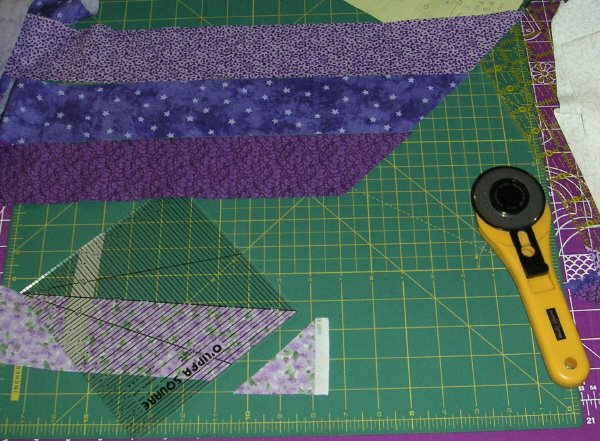
(Yay! I remembered to close the rotary cutter. That's a weakness of mine. :P)
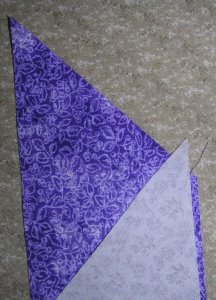
Next you need to sew the strips together. To make them line up after they're sewn, you need to let the corner overlap it by 1/4th of an inch. I didn't match up the fabric yet, but you can see how the corner overlaps the bottom piece.
Iron the strips open with the seams going all in one direction.
Now you should have one big diagonal piece. This is where you begin to cut the binding strips. I used 2.5", but I've heard that some like 2.25" or even 2". So just cut the binding strips into whatever width you like to bind with.
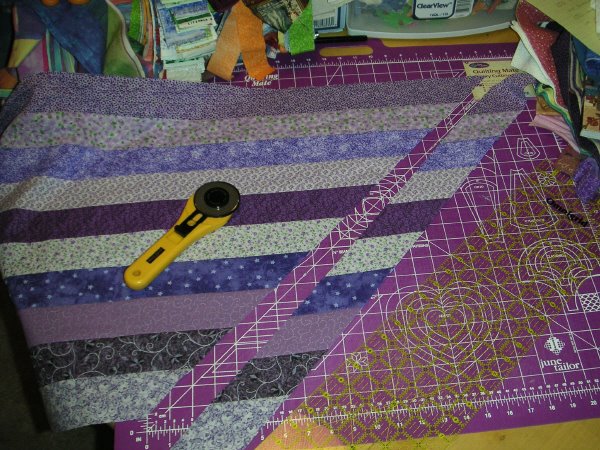
Hindsight is 20/20... My 10 strips were longer than the ruler, so it made it a little awkward to cut. I realized that I could have sewn them into two sections of 5 strips. It would mean more contineous-binding sewing, but no big deal. Also, you're dealing with a more noticeable bias here, so be careful with how you shift the fabric around.
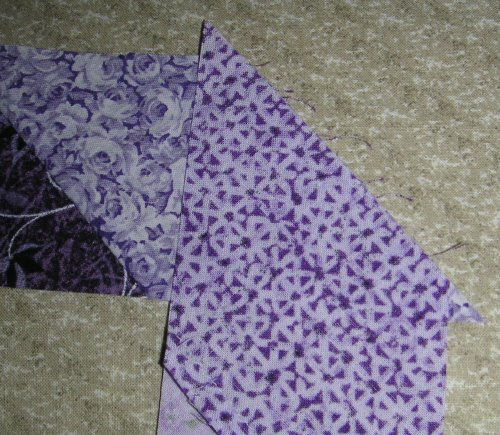
Next you need to sew the strips into contineous binding.

Again, you need to have a quarter-inch overlap - this time on both ends.
Sew all the strips together into however long of a binding you need. Iron the joins and then proceed like normal and sew the binding to the quilt.
Here is the binding folded together and ironed.

If you haven't done this method of bindings before, here's a link to how to put bindings on. And here. And here! Pick whatever works for you. :)
Don't forget that you're working with the bias, so it's going to stretch easier and you need to be careful as you hand sew down the binding that you're not distorting it. I was binding as I was watching the Olympics and seeing some of the contenders and boo-boos they would make made me nervous. My palms got sweaty, I forgot that I was holding the quilt, eyeballs glued to the TV until commercial... and then I started to notice the binding was getting distorted because the heat and moisture of my hands was acting like an iron. Oops! :)
Leah
7 comments:
Leah: Thanks for the great instructions and pix.
I get nervous for the Olympic participants too!
Judy L.
I love scrappy bindings like this! They are so fun!
Leah, thanks for the great photos and links on binding. I always have trouble joining at the end by machine, so I may try Bonnie's technique next time.
trish
www.randomthreads.com
wonderful!
thanks for sharing
take a look to my blog:
http://patchworkroma.blogspot.com/
m.daniela
Great Information! Just what I needed. In my blog I said you should of just called your post "Hey Deb This is For You".
Can wait to see the finished quilt.
(Not sure if my first comment posted, still having problems with internet speed.)
What a neat binding idea Leah, I like it, and in your purples, it's wonderful! Thanks for sharing your idea...*S*
I just stumbled upon your blog through Sunshine Quilts. I am so glad I stopped! I love this binding! I will definitely will be giving it a try!
Thank you for sharing and for the great instructions.
Post a Comment